Monday, March 28, 2016

Coming up roses.
I always seem to find myself either in Proverbs or Psalms if I need a pick me up or just my go to places to read. I decided I would "dress up" a page in Psalms with my first attempt at roses. (didn't practice before hand on scrap and mine came out fine but I wouldn't suggest it lol)
I can't wait to try it again and do some different types of flowers.  After doing this page I promptly went to the library and checked out watercolor books on how to do flowers. I think they are just so beautiful and these went up Really fast. I hope you take some time today and smell or paint some roses :)
It always brings a smile to my face!
Supplies: Pencil, "golden matte medium"(to prep my page), and watercolors.

Happy early Birthday to me!!

My loving parents gave me a new journal bible!!!!!!! (can you tell I am excited?)

This is the Esv Interweave bible.
The bible has a hard cover tan fabric cover. It comes in this nice hard box so if you give it as a gift it looks really nice and keeps it safe from damage.
Both of my bibles are from http://www.christianbook.com/
I have purchased from them for Years! and I am very pleased with the prices and how quickly you receive your items.


These are my two journal bibles that I currently have. As you can see the interleave is a lot larger then my 2 inch column bible.
The interleave has a full blank page between two pages of scripture. So you can do journaling or art on the page and have no worries of it bleeding through or covering the scripture. That is one thing I personally choose not to do is cover it so I can't read it because I use my bibles for studying or to bring to church. (if that is the type of creativity and option you personally choose then that is great! Go with it and let God use you as you create and study his word)


The bottom is the interleave and the top is my 2 inch margin bible. I have put washi tape on the beginning of each book of the bible. The interleave I did it on the long part of my bible and the 2 inch margin bible I put it on the top of the page. It was SOOO much easier to do the edge and I must say I love the look of it way better. I would definitely recommend anyone doing it!
***Tip- Go slow and take your time. Don't be in a rush and have less distractions as possible and you will have less chance of messing up. :)


Create in me a clean heart. The lord loves us no matter the sin or the life we have. He loves us and wants us to be part of his family. He will make that sinful heart clean and made new. I pray that my thoughts and my heart are now on Him and not of this world. Create in me a clean heart!

Supplies: Golden matte finish to prep the page, chalk, and micron pen.

Do you feel overwhelmed? That life and the worry is taking over you thoughts? Days like that do come and this verse in Psalms really hits home to me. When my Heart is overwhelmed lead me to the rock that is higher then I. I am not having to rely on me and my self to get through the hard times or stress of life. That when those times come that I can go to Him and know that he is in control of it all.

Supplies: Colored pencils and micron pens were

I always love how God always knows everything! How many hairs on my head or the stars in the sky. God knows each and everyone of us and I am so blessed that he does care for me.
A quick and easy page that is fun and a special reminder that he loves me...
 The page was prepped, colored pencils, and micron pens.

I total mess up!!

Have you ever messed up on a page it was Way to late to fix it? Well, this was me! I prepped the page before this and then I went and cleaned my brush. When I came back the pages had stuck together and I flipped by mistake to the next page! I drew it all out in pen and then I realized when I went to mark the words I wanted in the boot. I had drawn it on the WRONG page! an unprepped page and not the page I had intended to do it on. So instead I went with it. I realized that this is a learning mistake and that it doesn't matter I can still use this as a reminder that I am to use the Spiritual gifts that God has given me.
Psalms 90:2
Before the mountains were brought forth From everlasting you are God

What a wonderful promise this is. That God has been and always will be! Why worry? he is there and will take care of us.
I used watercolor and Micron pens to create this page.

1 John 3:11 God is Love
What a wonderful reminder that God is love!
I used chalk, washi tape, and micron pens to create this lovely page.

Be the light of the world

I was reading through this portion of Psalms and I felt like it was important reminder to be the light of this world. God calls us to be the Light of the World and to share that with others. Have no fear, walk in him and stay faithful no matter what.
I used colored pencils and Micron pens.


Bold as a lion!
How often are we able to do that? To stay true to God?
That is my Prayer that I will have that boldness and to show love to those around me.

As I created this lion I used a pencil and drew him out just the main areas. (pretty much what looks black is what I did)
then I went over it lightly with colored pencil to make a nice base for the lion.
I then dug out my water colors and just started layering him up and adding more color or detail when I thought it looked like he needed it.
This is the first Animal I have ever drawn and the use of water colored pencils also. I am very pleased with my first attempt.
I hope you have Boldness today!

Muffins
Who doesn't love a nice warm muffin? My biggest thing is time to get it all made in the morning or with a 1 year old. So I decided to experiment with some recipes and this is what I came up with by combining a few. You will mix the dry ingredients together and have it in a bowl for whenever you are in need or want muffins made you just scoop it out and add the liquids. Easy peasy right? It has made life so much easier..

Muffin recipe

8 Cups flour
2 Cups sugar
3 Tablespoons baking powder
2 Teaspoons salt

Mix well and store in an airtight container.

When you are ready to make muffins add
2 1/2 cups of dry ingredients 
1 cup milk
1 egg
1/2 cup of melted butter or oil. (I like half oil and half butter)

Grease muffin tins fill 3/4 of the way.
Bake 400 for 18-20 min (mine are done in 18)

Options to add to your muffins before baking

Blueberry: 1 cup of fresh or frozen. (1/4 tsp of cinnamon, dash of nutmeg)

Doughnut muffins: Bake the muffins and when they are cooled dip in melted butter and dipped in cinnamon and sugar.

Coffee: 2 tsp instant coffee and 3/4 cup of semisweet chocolate chips

Jam filled: Fill half of you miffin tin with batter add a tsp of jam and top with enough batter to fill your tins 3/4 of the way.


Bible Art Journaling Isaiah 1:18

As I spent the weekend with my mother we decided we were going to take some quality time and do some bible journaling. It was such a pleasant time and we both tried a few new techniques. This page we Prepped our page with "golden matte medium" and then used water colors, along with a white pen to add the bright white on the tree and the snow.
This is the tutorial we used:
Watching susan we were able to just enjoy trying something new.
 https://www.youtube.com/watch?v=PPnFhpJMwmQ

I hope you are encouraged to try something new today!


Tuesday, January 19, 2016


On the edge
As I saw the beautiful edges that others have put on their bibles I started getting nervous about mine. Would I like it would it be mess up!!! Over and over I thought about it. I wanted to use a stamp and if I used a stamp it would be permanent on the paper. So I promptly got my husband to come and help me hold my bible REALLY tight so the pages were together. I put the stamps on the     edges.. I figured I just needed to do it! I really like the dragonfly and the leaves on the main edge. I am satisfied with the flour it isn't how I thought it would turn out after I colored them in with pens but it could have been WAY worse haha..


This edge looks different right? I wanted to add washi tape (decorative craft tape) to the first page of each chapter. I was going to do it down the main side of the bible which had my dragonfly on it but like I said above it was my favorite side of the bible how it came out.. So I wasn't sure how each chapter with tape would make it look. So instead I did the top edge of my bible. I get the best of both worlds. The worst     of the edges were now kind of separate so you don't see the mistake and I get the look of the washi tape on the chapters. It was time consuming! It would have    been much easier on the main edge then at the top and having to deal with the binding. Yet it was worth all the struggle :)
My mother just did hers a week or so ago and she did all 3 sides! it looks really nice also. I wish I had taken a picture of it for you all to see. But whatever you decide just go with it! love the results and embrace your choice. No turning back right!?!
    Here is how the pages look and the washi tape that I used. I bought a pack from the craft store and it all corrdinates together.


Inside cover
It is so nerve racking to start your first bible entry. I was so scared to mess up that it wouldn't be pretty or that I would be judged for my creative entry or style. So to get past that I decided to do a permission page. I had seen a few of these on pinterest and I knew it was the first entry that I was going to do.

I used rub-on letters for this bible is for... and then I used pens and put down different things that most likely will happen and I would be ok with it. That life is full of mistakes and differences. It was a relief to write down my fears and concerns and move forward.

This is the page beside my permission page. I wanted something on there that was different. I had a large stamp that fit perfectly in that spot. Then I added the flourish above and below.

I put when I got my bible, my salvation, and I just realized I didn't put my baptism on it which I will have to go do!


It was the first step to my creative devotional time.. 
I enjoy bible journaling and I needed a few books to go along side my bible. Once again I just bought cheep ugly ones and decorated my covers fun. It helps to have something pretty to look at and it makes you enjoy opening them and using them. Have fun either buy pretty ones or be creative and make your own beautiful.

 Starting from top to bottom.. The top is my journal as I go through a book of the bible in depth I write down the information I am learning from that book.
The middle journal is my prayer journal. I have kept a note book or paper with prayers on it but this year I am trying to have a better prayer life and to have it organized. So I put the names, date,and then the prayer requests. Once it is answered I put a check mark beside that request and the date it was answered. It is so nice to sit with a cup of coffee and pray over the people you love most. I encourage you today to start your own.

The bottom larges one is a art book. This is what I use to doodle a bible journal entry first. Or test colors with color pencils, paint, water colors ect. It is just a messy book that helps me feel more confident when doing a bible journal entry.


                                                              Bible cover
So who doesn't like a pretty looking bible? When I purchased my bible it was UGLY! but it was cheaper and the bible was the size I liked best. So I figured I would just make my own. So that is the first thing I did for my bible. I bough heavier fabric and just cut it out slightly bigger then my bible.

I needed to add something to keep the bible shut so it didn't flop open. I had this red ribbon that is very wide 2 inches. I took a piece of 1/2 inch elastic and cut it to the size that fit the bible around. I took the elastic and stretched it while I sewed on the ribbon. I made the ribbon overlap in some areas when I sewed it so that it would look more ruffled.
I am so pleased how it turned out. I am not waiting until I find some fabric that is thicker chevron pattern... Why not accessorize your bible?
Bags Bags and more BAGS!! 
Are you like me you keep your bags "just in case?"
After awhile they get out of control and there is way to many. My cupboard that I have under my sink is where I keep mine. Then before I know it they are falling out every time I open the door

So I have been slowly the last few weeks going through my home and making it less messy getting rid of things and organizing and this morning my son opened the door under the sink and guess what? BAGS everywhere!!

So instead of putting it off I decided I might as
Well organize them. So as you can see I had a Big pile on my counter. I thought how am I going to organize these things? Then I thought back to making those little paper footballs when I was a kid so I tried it on the bags and they work wonderful!! Plus it takes less then 1 minute to fold to fold.

The first picture shows the huge pile and this picture I placed on a bag to show how small my pile is now. It is so manageable Plus you can tuck a few in your purse if you have to have a garbage bag or to hold something in an emergency. I am going to put a few in the car when I need a trash bag for the boys and their messes. Easy peasy!


Step 1:
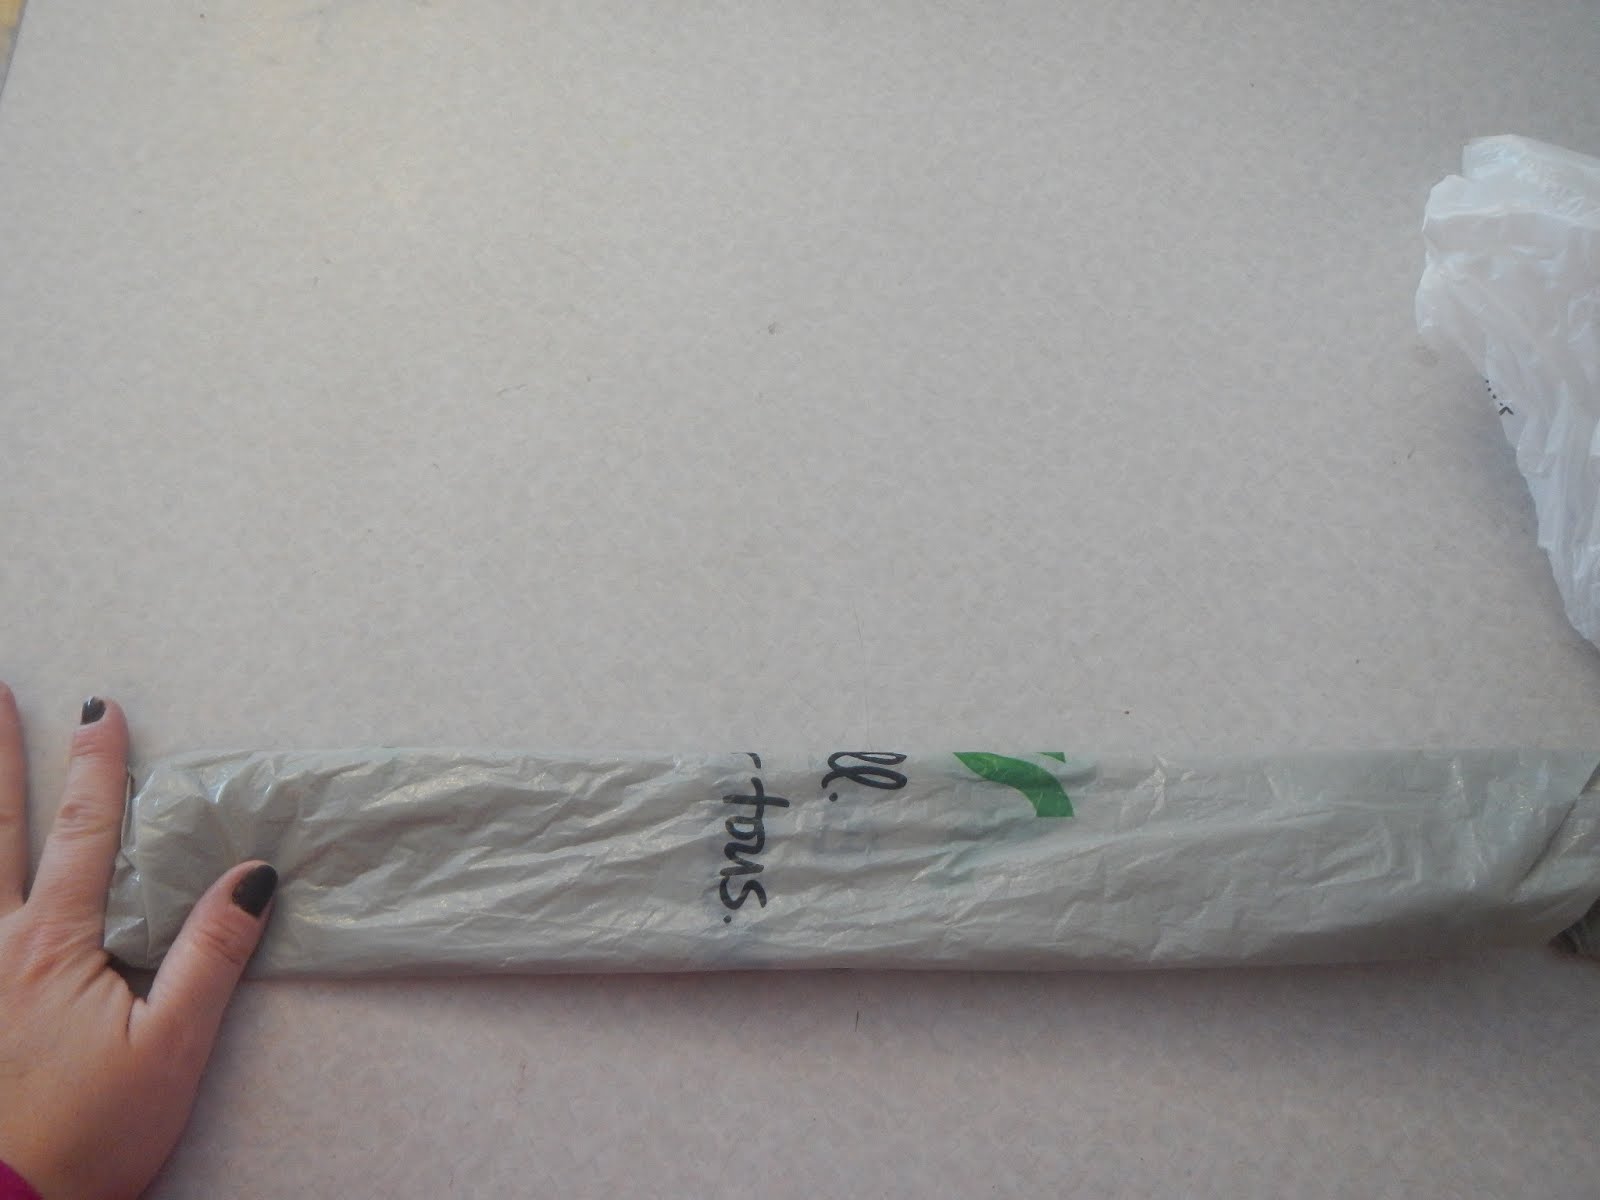
Lay your bag nice and flat.


Step 2:
Fold the bag in half


Step 3:
Fold that in half


Step 4:
Fold over again so you have about 1.5 to 2 inch wide strip of bag.


Step 5:
Now to start making the triangle.
As you can see in the crease I made you fold that in a small triangle.


Step 6:
fold it over so it looks like this.


Step 7:
Keep folding that triangle from left then right side. all the way up the bag.


Step 8:
When you get to this part you will stop folding the triangles.


Step 9:
I turned the bag around so you can see that the handles of the bag are still sticking out and if you left it like this the little football would fall all apart again.
So as you can see I have lifted the "pocket" that on the opposite side of the handles and pulled it open.


Step 10:
Now tuck it right in. Make sure it is in there good and tight!!


Congrats you are done!! Now on to the rest of the bags you have to fold.


Monday, January 18, 2016

New recipes tonight.
I made plain white rice,
roasted broccoli,
and honey mustard chicken and pork.

Broccoli:
I had a large bag of broccoli from costco and used half of it.
I placed the broccoli on foil and drizzled about 3 tablespoons of oil on top. Seasoned it with salt and pepper and then used 3/4 tsp of dried garlic pieces. (or use 2-3 cloves of chopped garlic)

Baked on top rack for 30 min at 375F.

This is so yummy.. I will be making this again for sure. It didn't last long with the 5 of us.

Honey Mustard Chicken / Pork
So tonight I didn't have enough pork to feed us all so added a chicken breast to the pan.
Season your meat with salt and pepper then I drizzled mustard all over the top. Don't be shy!!

Then I put it in the oven at 325F for 30 min.
I then made a glaze
1/2 cup brown sugar
and enough honey to make a paste I didn't measure but most likely 1/4 cup.
Mix it together and add more honey if it is to thick. Then just smother that over the top of the warm meat. Cook until your meat is fully cooked.

Now here is how it tastes SOOooooOoo good.. Cut your meat on the pan that you cooked it in. Sliced like in the picture above about 1/2 inch thick to 1 inch thick. Then just soak both sides in the drippings before placing it on the plate. It will add so much flavor and you and your family will go back for seconds or thirds so be prepared ;)
My boys loved this and told me I had to make it again..
I hope you enjoy Happy Cooking

Wednesday, January 13, 2016

One-bowl chocolate cake
From Better Home and Garden new cookbook

It is a snow day here at our house. So my oldest son Ricky wanted to bake a cake. We had only one egg left in the house so the search for the cake that he wanted to make that had only one egg began.

He found this recipe which we had never tried before but why not right? Chocolate cake sounded great so off we went to make it together.

It turned out tasty about 4 stars I would say.
Here is the recipe:

1 cup flour
1 cup sugar
1/2 cup unsweetened cocoa powder
1/2 teaspoon baking soda
1/4 teaspoon baking powder
1/4 teaspoon salt
3/4 cup milk
2 tablespoons instant espresso coffee powder
1/3 cup cooking oil
1 teaspoon vanilla
1 egg

In a large bowl combine all the dry ingredients
mix the espresso and milk together and put that into the bowl, add the oil and vanilla, Beat for 2 minutes with a hand mixer. Add the egg and then beat for another 2 minutes.
Grease a round 9 inch pan
pour batter into the pan and bake 350 for 30-40 minutes (ours was done at 30 minutes) the toothpick came out clean :)

Place the cake and pan on a wire rack and cool for 10 minutes and the take out of the pan and cool completely. (I didn't read this part so I just popped the hot cake right out of the pan onto the wire rack and let it cool.)

Now to make the glaze:
4 ounces of semisweet chocolate and 3 tablespoons of butter. Melt this over low heat stirring frequently. This will not take long to melt.
Add 1 1/2 cups of powdered sugar and 3 tablespoons of hot water Mix and you can add more water if it is to thick.
Spread over the cake and Enjoy!

Tuesday, January 12, 2016

Chicken Stove Top Casserole 
One of my favorite meals. My mother in law makes something like this and I never write down her recipe. So today I thought I would share the way I make it. It is great for left overs or just cook some fresh chicken and make yourself this chicken casserole. Plus it is super easy!!

Recipe:
4 chicken breasts cooked cut to bite size pieces
1 can of cream of mushroom soup
1/3 cup of sour cream                                         
2 cups frozen mixed veggies
 1 box of stove top stuffing (cooked)
  Optional: add a handful of cranberries to my water before cooking
                                             
In a casserole dish either a deep 8x8 like mine or you can use a 9x13 pan put your soup and sour cream (or milk) in the dish mix well and then add the chicken mix well again.
Put the 2 cups of frozen veggies on top of the meat.
Now to put the stove top stuffing on top.
Bake at 375 for 45 min.


Monday, January 11, 2016

Bible Journaling
This summer a friend of mine sent me some pinterest pins about Bible journaling. She was interested in doing it and thought that it might peek my interests. Which it did right away! I couldn't wait to get my own bible journal. So for my Anniversary my lovely husband said to order the bible I wanted for my gift.. I was over the moon excited.

I am not sure about you but I research the heck out of something before I order it. I spent time and figured out which one I wanted to order. Then the waiting started... and I waited... and waited... for the parcel to arrive. Then one wonderful morning my bible was delivered!

I must say it was not easy to start. It really made me get out of my comfort zone to try and create entries that I envisioned. I was so scared to mess up, or that it wouldn't be good enough. As I stepped out and just did it.. It was so much fun. I will be posting my entries with you all. I hope you are encouraged to start your own. There is nothing more encouraging then spending time with the Lord and using that creativity that he has given you to spend time with Him.

I hope you will join me in this journey this year.  
 Two tone snowflake
My little guy decided to help model this hat. I couldn't get a great shot of it flat. When he saw me taking pictures of it he HAD to have it on. So there ya go thanks Jayce! :)

It is a blue bottom and then changes half way through the snowflake and is a striped blue tone yarn. It came out just the right size. I will be adding this to my knit again pile for sure.


Snowflake Flower Hat
I think this is my favorite color and pattern. The only sad thing is that the pattern I made ended up to be a large size hat. Oh well there must be a friend of mine that has a large head right? lol

I will most likely make this one again at another time and a smaller needle.
This marble yarn is lovely and is a pleasure to knit with. It is warm and cozy. I was able to purchase this specialty yarn at a local small crafting store. It is fun to try a different type of yarn and pattern. You never know when you will find something you love to work with.


Star Wars Hat
The week that star wars came out I decided to make a hat that is star wars. I think it came out so great and the change in the pattern makes the hat so interesting.

My husband took us with him to see the movie and the boys were so excited. It inspired me to knit. See even star wars pushes knitters to get knitting haha. 
All Hearts Hats!
This past month I have been working on hats. I really enjoy trying new patterns with Fair Isle design it looks so great and keeps my attention.
Here is the first one I made this year. White with a variegated heart.

Meat Loaf
This is a meal I make about every other week. The Men/boys in my house just love this meal. There will not be much left over that is for sure.

Recipe:
1 pound of ground beef
1 pound of ground pork
1 cup of dry bread crumbs
1 cup of milk
1 egg
1/2 onion finely chopped
1 tsp of salt
1/4 tsp of pepper
1/4 tsp dry mustard
1 clove of garlic or 1/4 tsp garlic powder
1 tablespoon Worcestershire sauce
1/4 cup of bbq sauce (plus some for topping)

Mix all together and place in a bread pan, or a make it into a round loaf like I did and place it in a pampered chief large baking bowl.
Top with BBQ sauce. Drizzle all over it this makes it SO yummy!!

Bake 350 for 1 1/2 hours

Serve with some veggies and whipped potatoes

Whipped Potatoes:
cook enough potatoes for your family.
Drain them well once cooked through.
Add a heaping spoon full of butter, milk, and I use dry minced garlic in mine yummo!
Use a hand mixer and mix well It should be creamy add more milk if it is still to thick.
Enjoy!